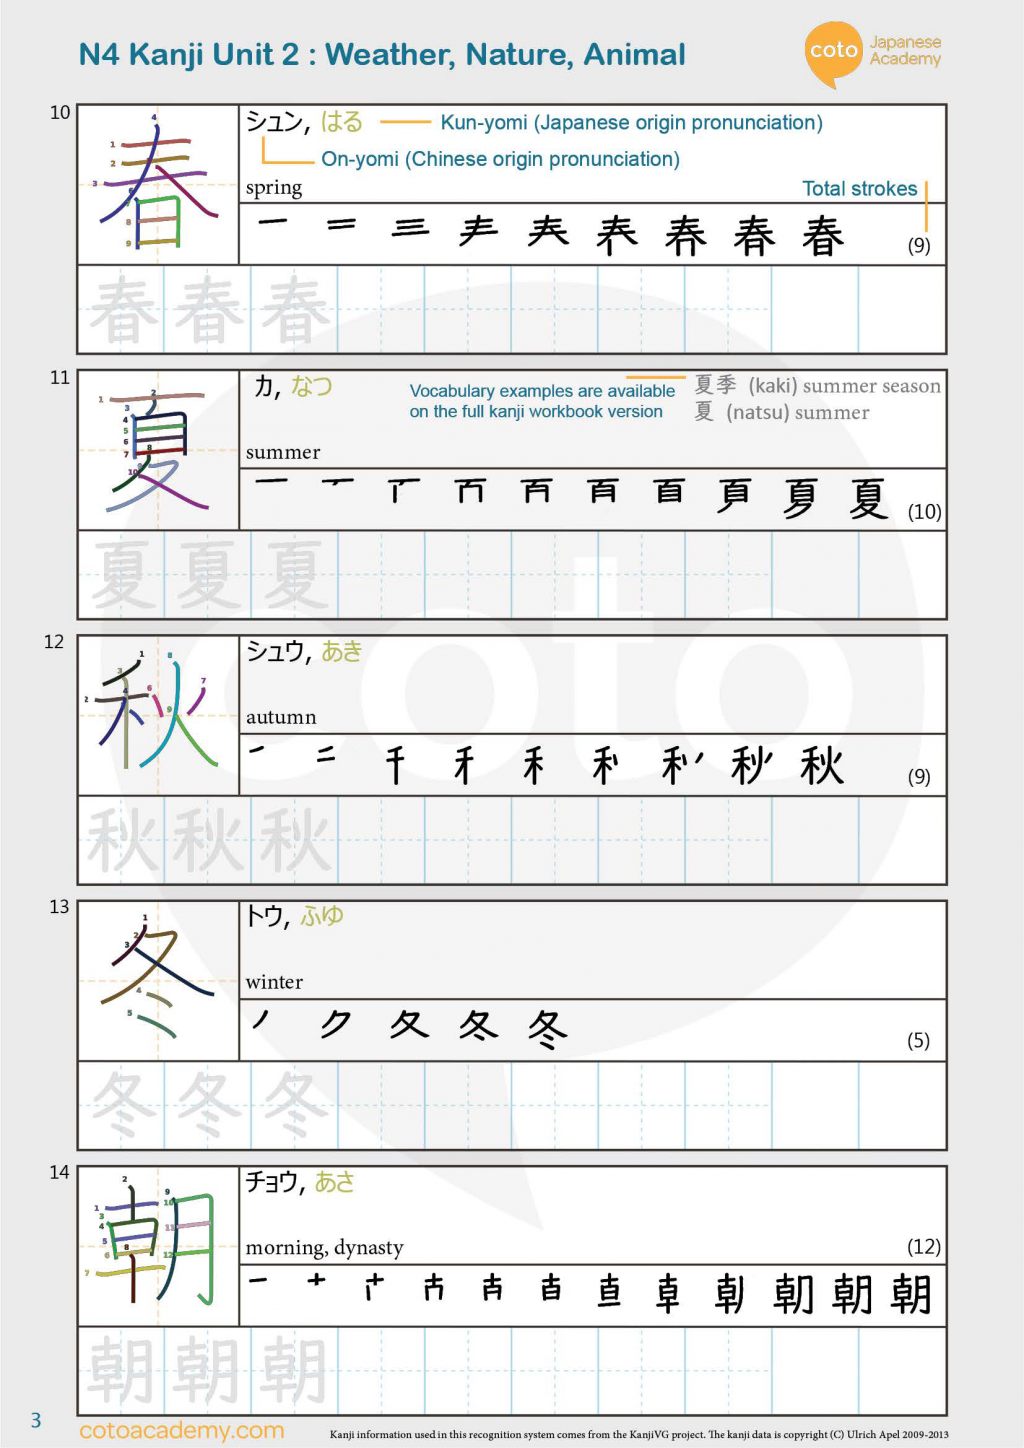
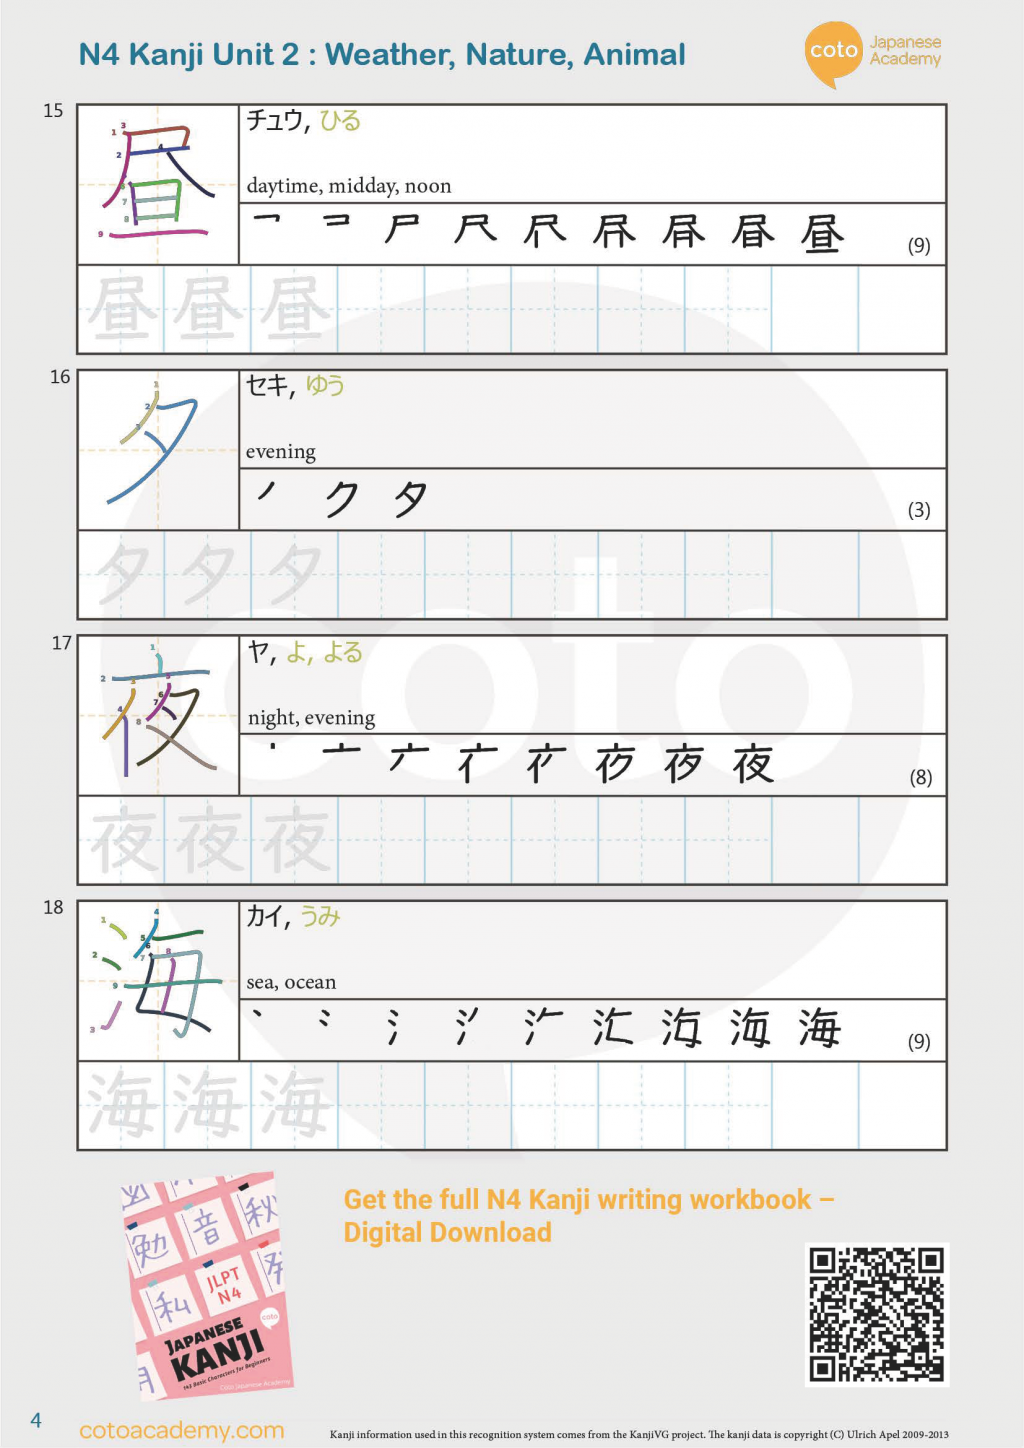
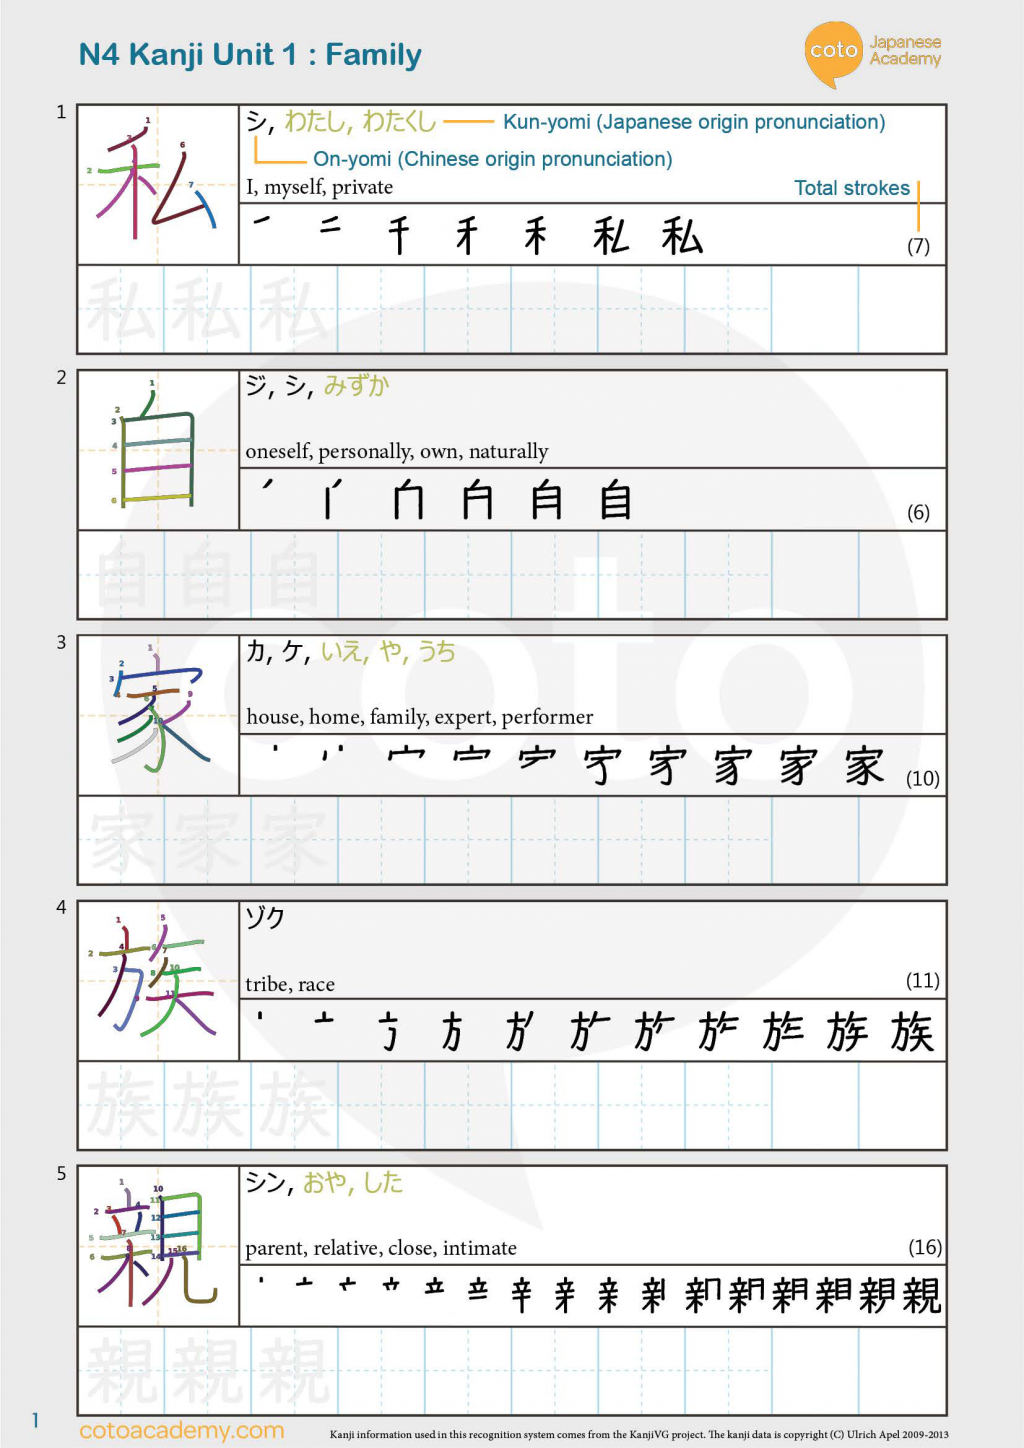
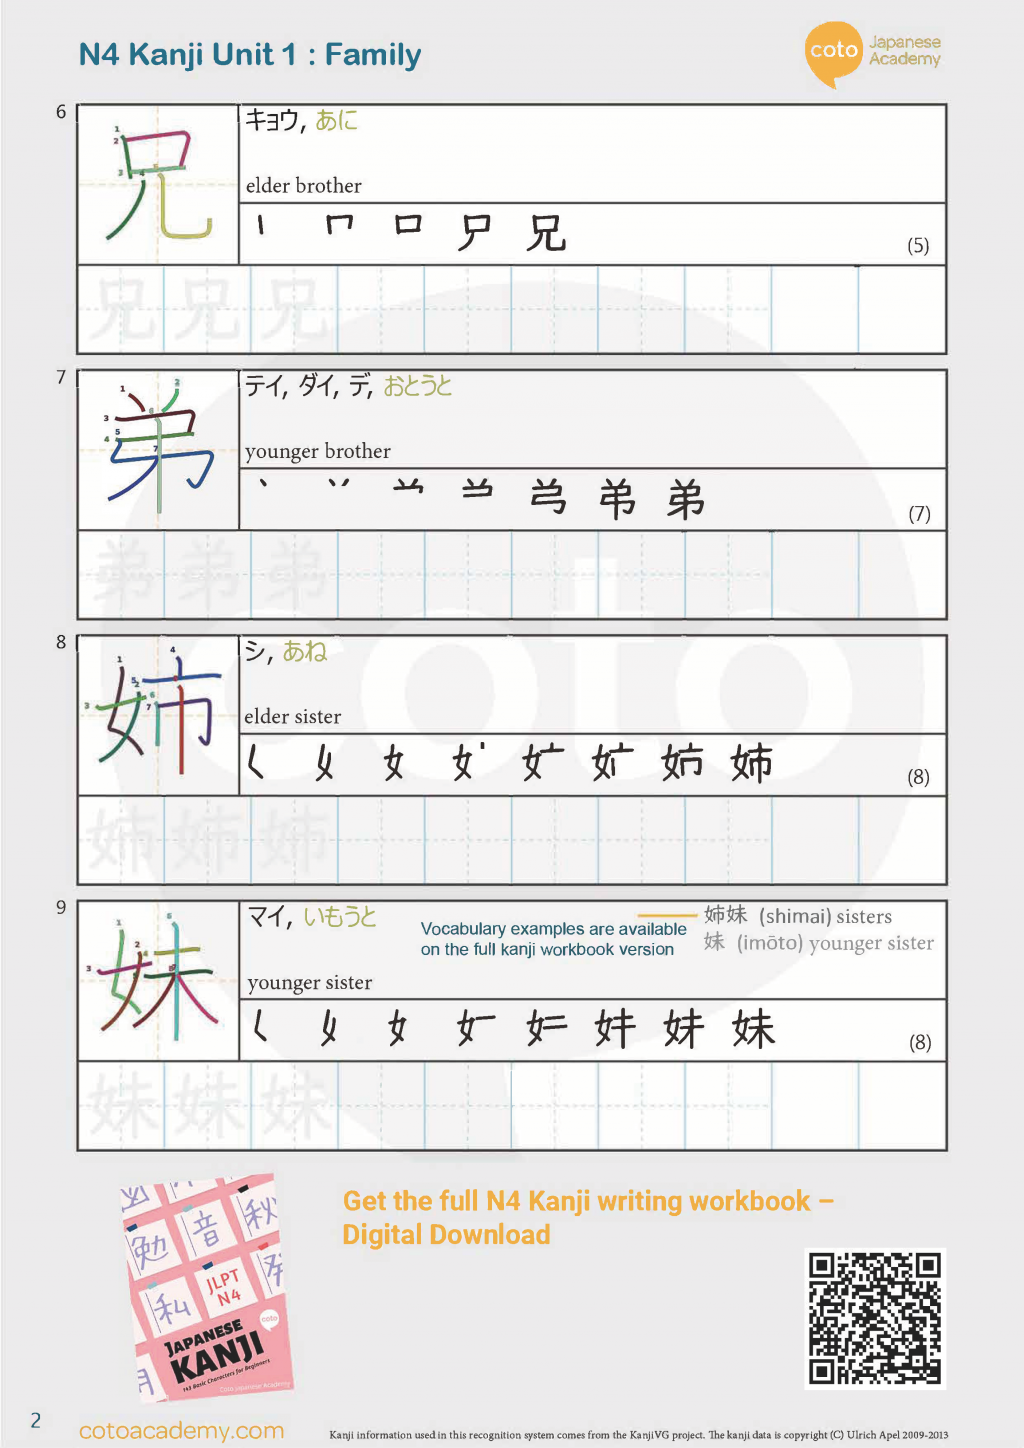
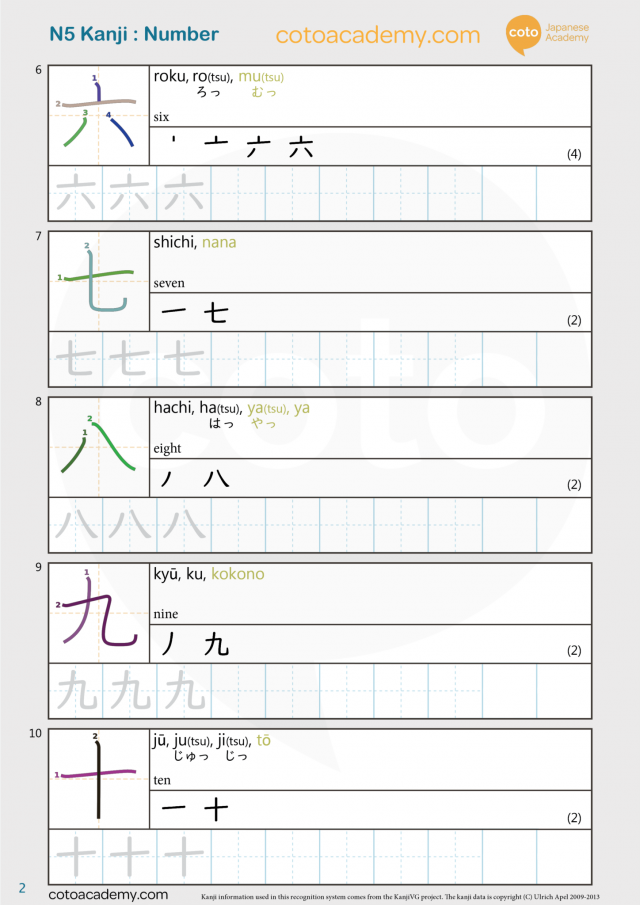
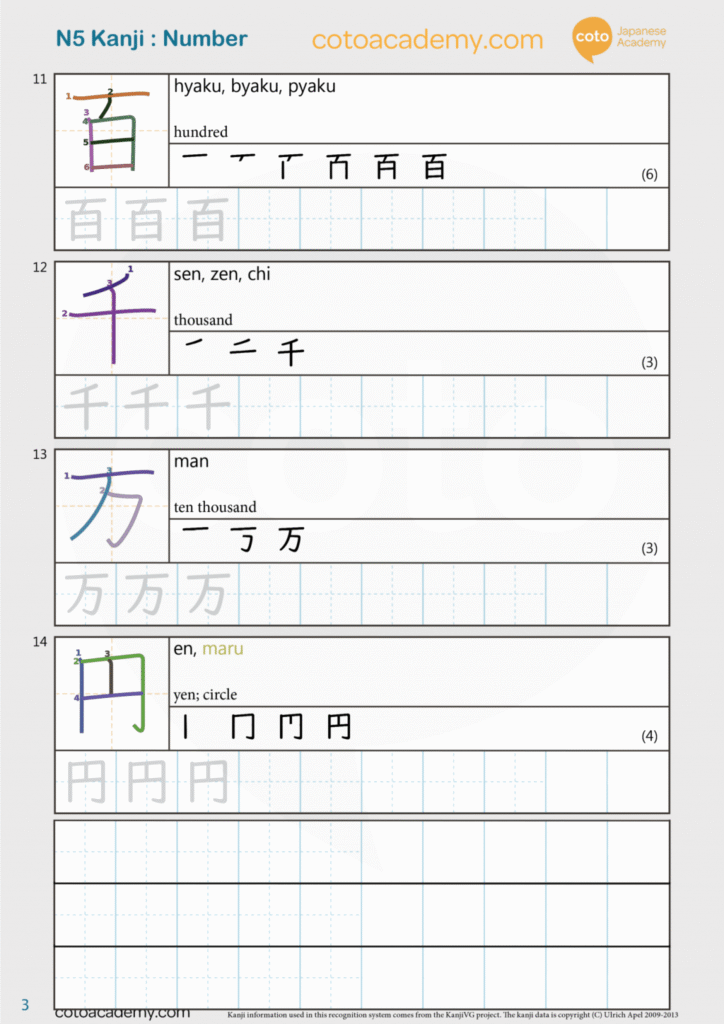
Learning and practicing your N4 Kanji? Do you know what kind of words to use to describe your favorite hobby? If you don’t, you will shortly after using our Kanji Worksheet
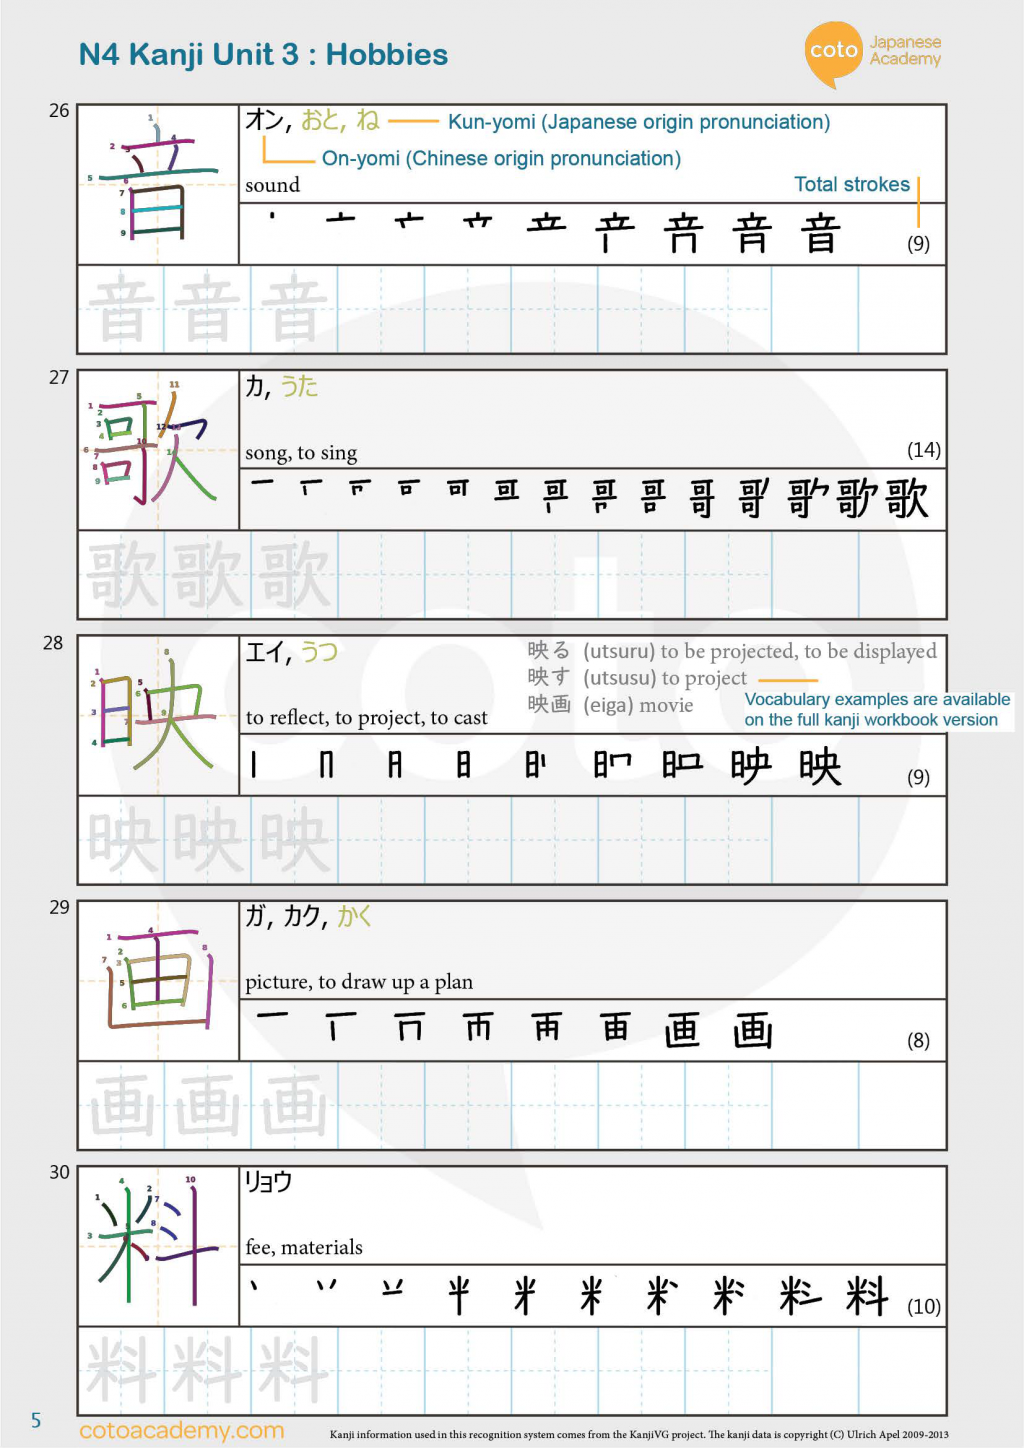
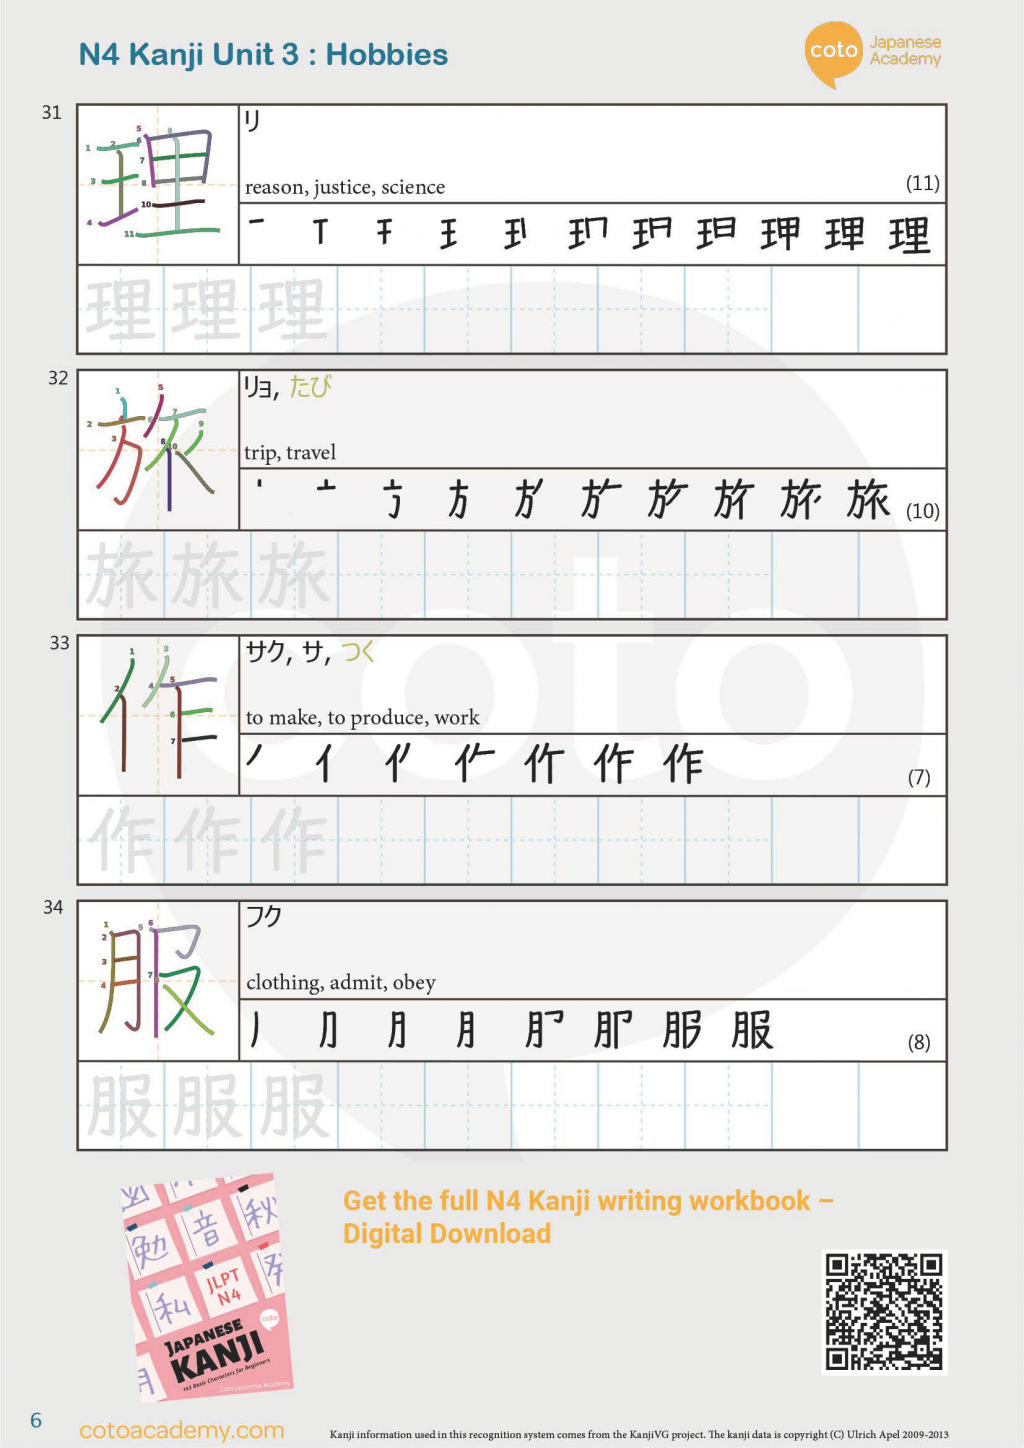
We have a new unit for you!
This is the third unit in the JLPT N4 series of free Kanji writing practice sheets that you can download and print.
You can check out our previously uploaded worksheets as well as look forward to more that we will update soon!
Click here to download: FREE Kanji Writing Practice Sheet – JLPT N4 Hobbies – PDF
https://cotoacademy.com/japanese-hobbies-sports-vocabulary-%e3%83%bc-sentence-examples-part-1/
https://cotoacademy.com/support/free-jlpt-kanji-writing-worksheet-pdfs-for-jlpt/?preview_id=42594&preview_nonce=b293a95dac&preview=true