How to migrate your account from the old system
a
Step 1: Login with your account details
a
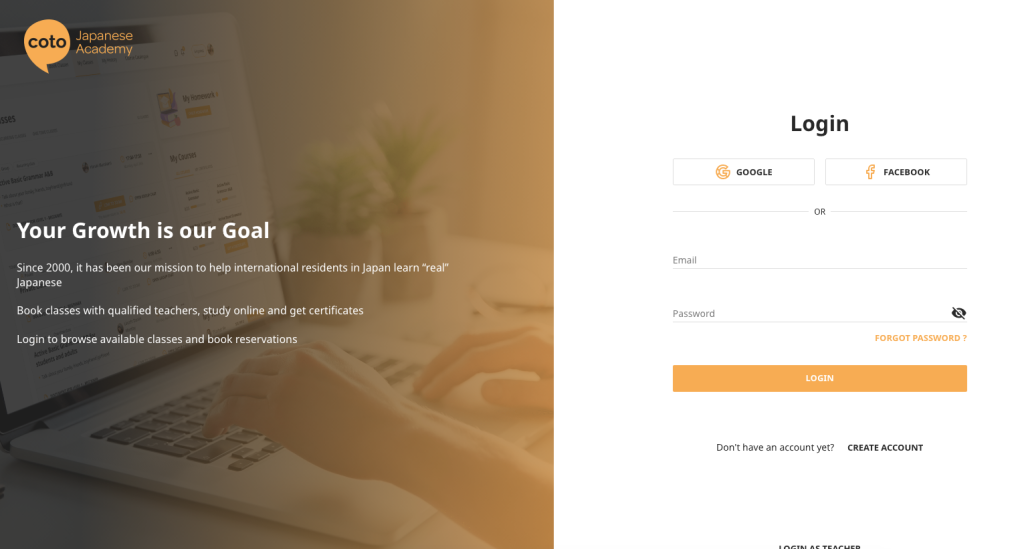
Visit the new website at https://new.cotoacademy.com and login with the following details:
a
1-1 Students: Login with your existing username / password. WAIT FOR OUR NOTIFICATION. YOUR RESERVATIONS ARE NOT YET SET UP.
Group students: Login with the email address you received the you are invited to Coto email with. YOU CAN NOW SIGN IN.
Step 2: Click resend email
a

You will be able to click re-send email to issue another migration link.
It will appear in your inbox and look like the image below.
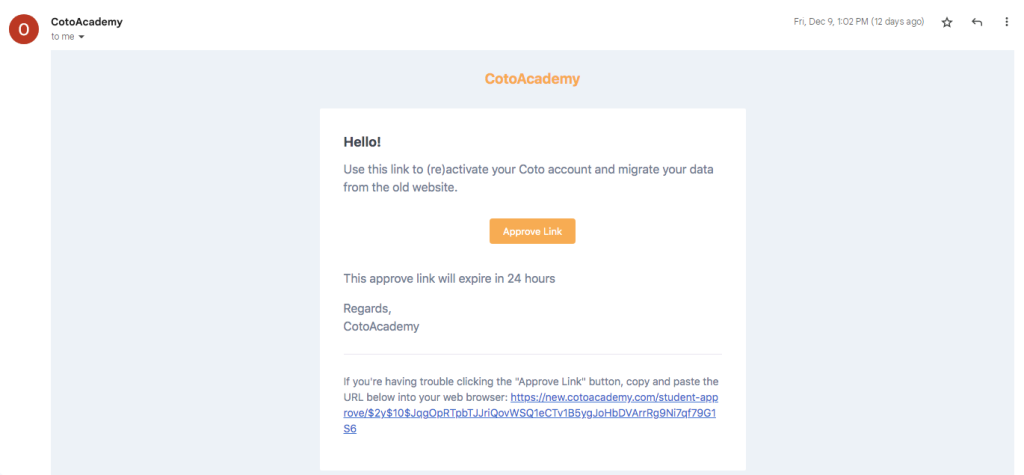
When you click on the link you will be taken to the data migration page.
Step 3: Open the migration link
a
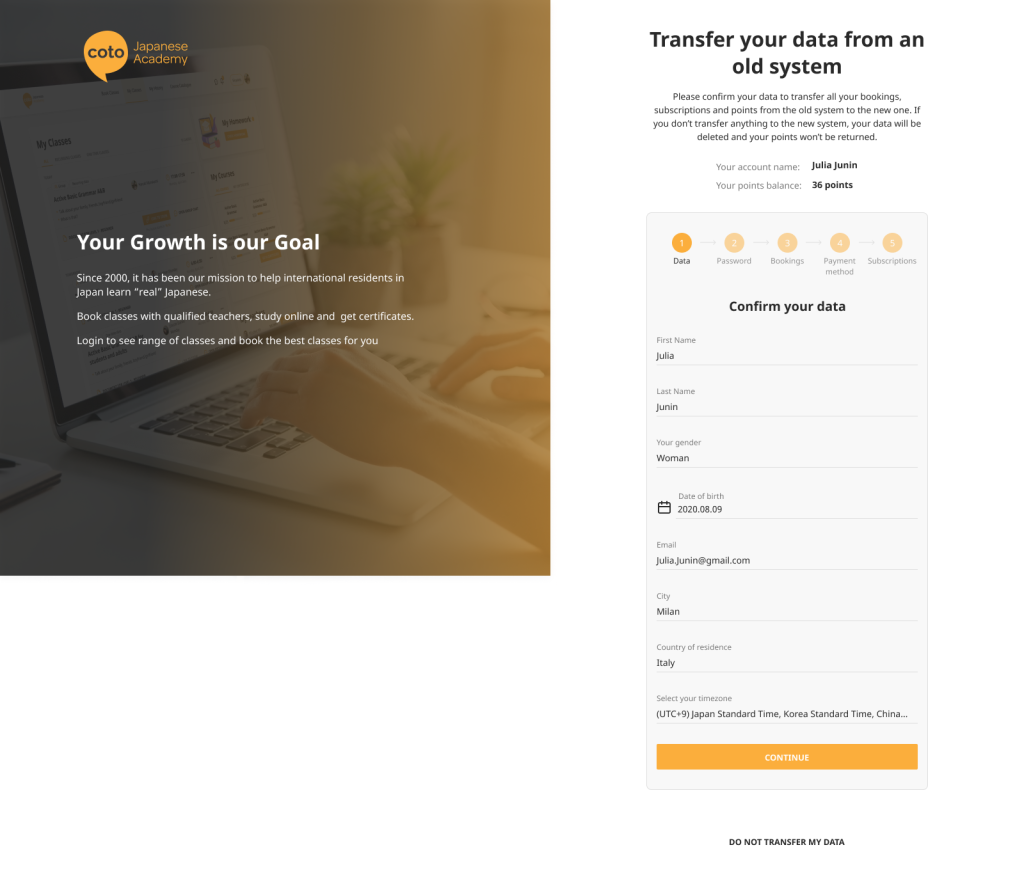
Important: Set your timezone correctly.
Time zone is very important. Make sure to set your time zone correctly as it will display all of your classes and expiration dates.
Step 4: Set a password
a

The system will ask you to set a password. Choose a new password or re-enter your existing password.
Step 5 : Confirm your bookings (if you have any)
a
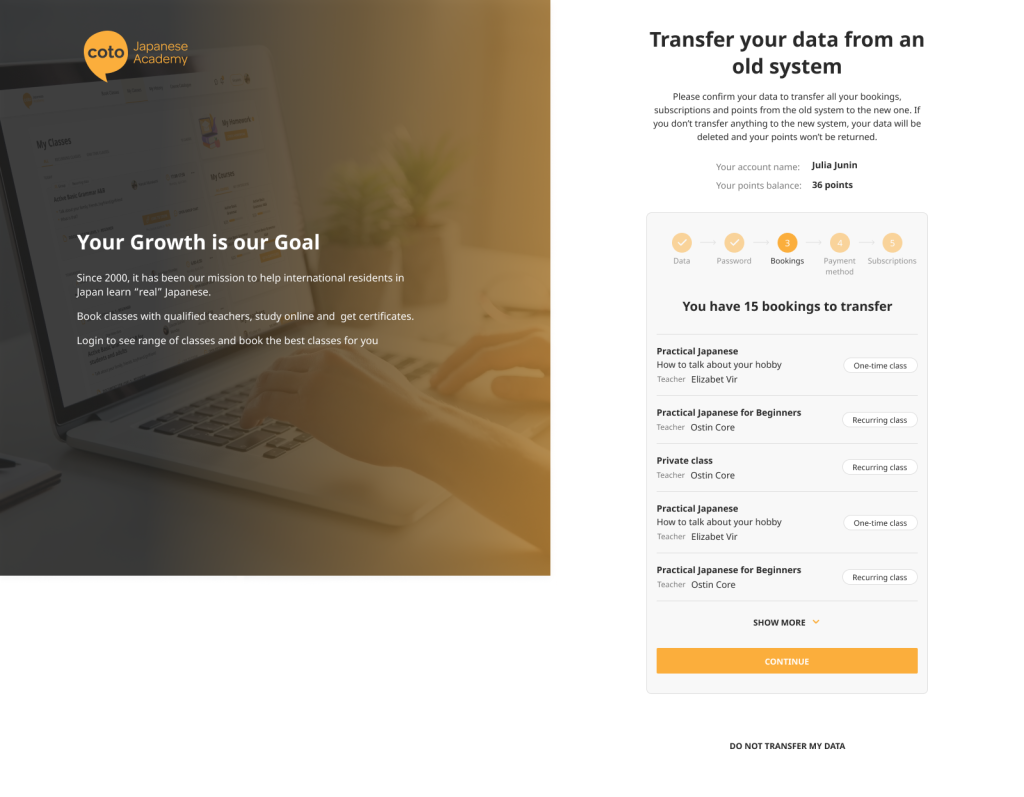
If you have pre-programmed recurring booking in the system, Confirm them by clicking continue.
For some students you may not see this step.
Step 6: Add a payment method
a
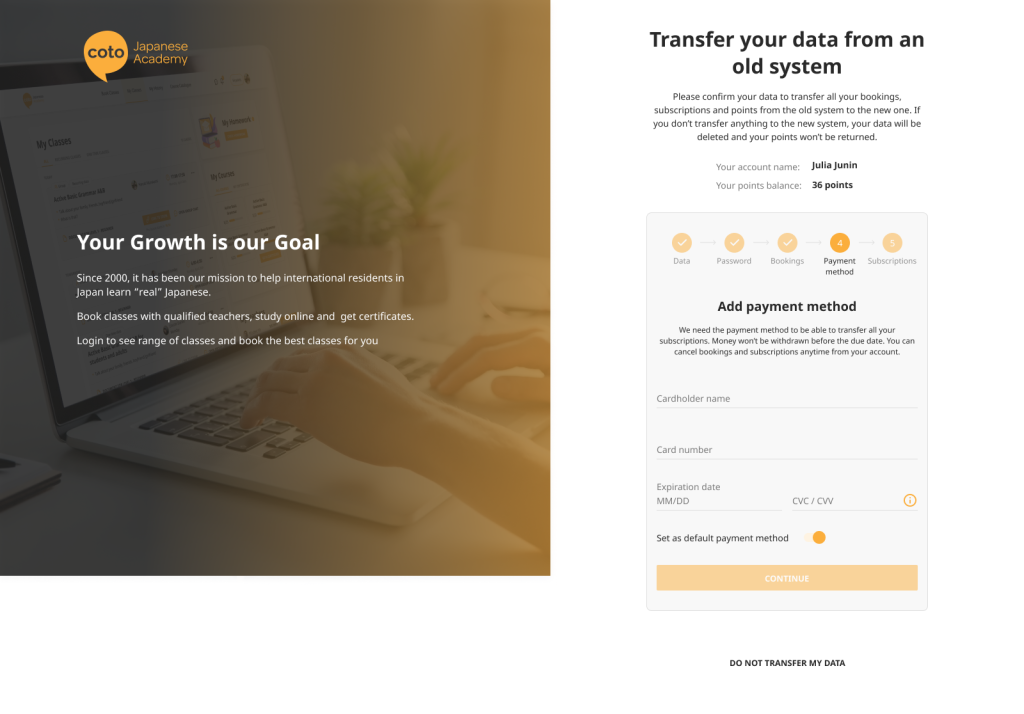
Add a payment method so that you can complete point purchases or add a new subscription if you need to. This payment method will also be used to activate any pre-added subscriptions.
All group students must add a payment method.
Step 7: Confirm your subscriptions
a

Step 8: Confirm that your data has been migrated
a
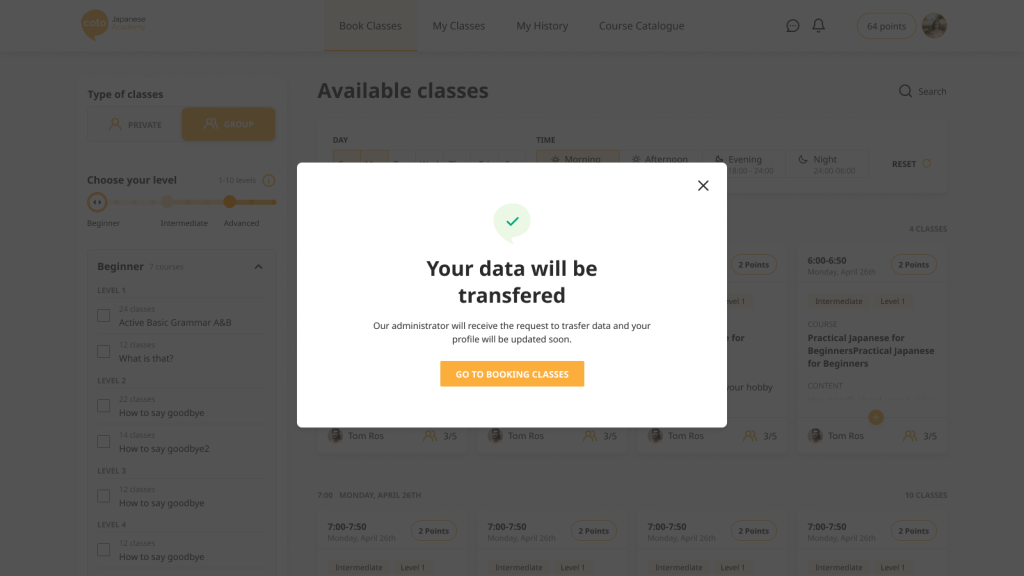
You will see a confirmation screen! Congratulations – you can now start using your account on the new system!